Chocolate Honeycomb Bars
Highlighted under: Comfort Desserts
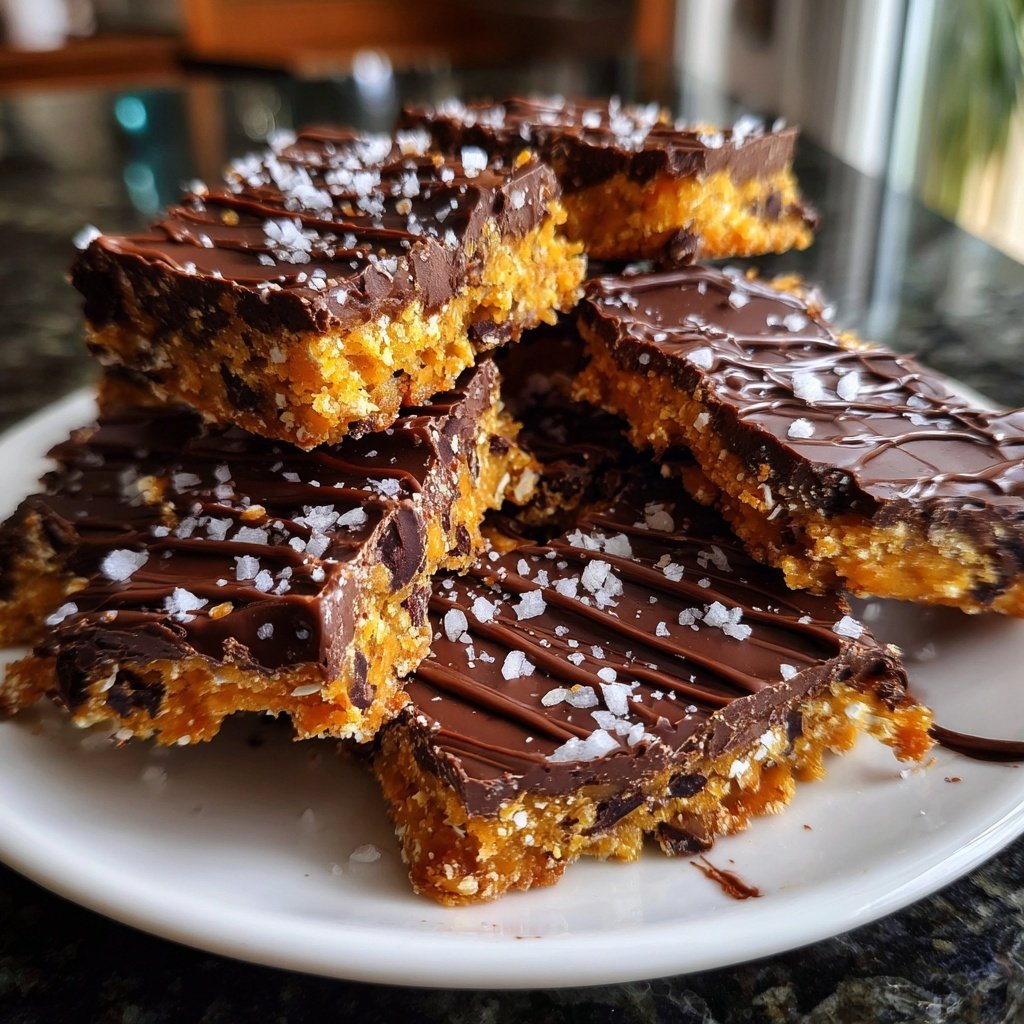
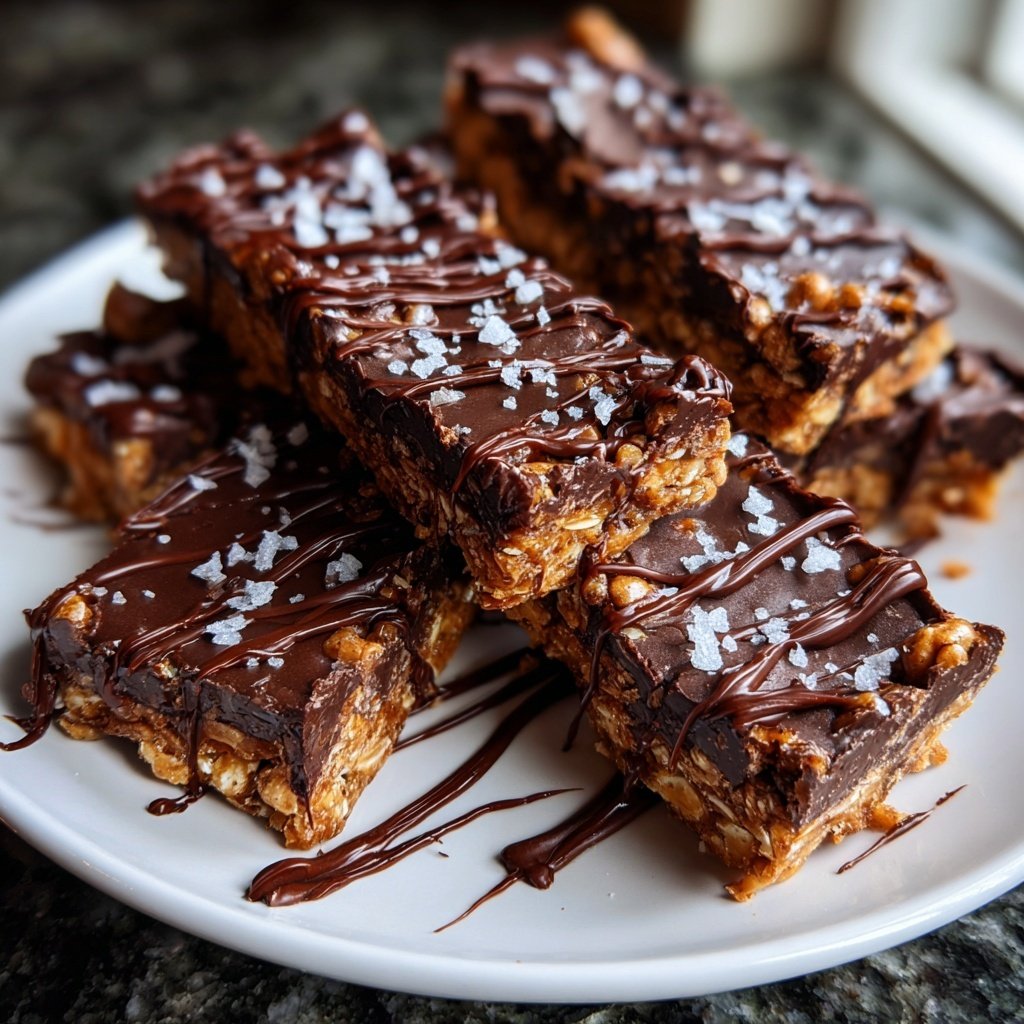
I absolutely love making Chocolate Honeycomb Bars whenever I want a sweet treat that’s both crunchy and creamy. The combination of rich chocolate and crispy honeycomb is simply divine, and they are surprisingly easy to make at home. My family always gets excited when I whip up a batch, especially because they remind us of childhood treats. Plus, the process of making the honeycomb itself is a fun kitchen adventure that’s worth every sticky moment!
When I first tackled the recipe for Chocolate Honeycomb Bars, I was amazed by how the combination of baking soda and syrup creates that delightful honeycomb texture. I specifically used light corn syrup for its smoothness, which made the process easier. The first time I tasted them, the sweet crunch was complemented perfectly by the rich chocolate, and I knew I had stumbled upon something special!
After that, I experimented with different types of chocolate, discovering that dark chocolate pairs beautifully with the sweetness of the honeycomb. A little pinch of sea salt on top balances the flavors perfectly, enhancing every bite. Trust me, you’ll want to share these delicious bars, but you might find it hard to part with any!
Why You'll Love These Bars
- Rich chocolate coating that harmonizes with sweet honeycomb
- Perfectly crispy texture that adds a delightful crunch
- Easily customizable with your favorite toppings or nuts
Mastering the Honeycomb
Creating the perfect honeycomb requires precision in temperature and timing. Once you’ve combined the sugar and corn syrup in the saucepan, keep a close eye on it as it heats up. You want to reach a light amber color, which typically takes around 7 to 10 minutes over medium heat. If you don’t let it cook long enough, the honeycomb may remain chewy instead of achieving that delightful crunch.
When you add the baking soda, the mixture will bubble vigorously. This reaction is crucial as the baking soda introduces air, allowing the honeycomb to expand. Stir quickly but gently to incorporate it without deflating the mixture. Remember that the honeycomb will continue to cook slightly from residual heat, so pouring it into the prepared pan immediately prevents over-cooking.
Choosing the Right Chocolate
Selecting high-quality chocolate for the coating is essential for achieving the best flavor and texture. I recommend using dark chocolate with at least 70% cocoa content for a rich, intense flavor that balances the sweetness of the honeycomb. If you prefer a sweeter note, semi-sweet chocolate also works well.
If you’re looking to customize, consider adding different flavor notes to the chocolate. A drop of vanilla extract or a sprinkle of sea salt can enhance the overall experience. For a lighter coating, you can substitute half of the dark chocolate with milk chocolate, resulting in a sweeter profile that kids will adore.
Storage and Serving Suggestions
Once your Chocolate Honeycomb Bars are set, store them in an airtight container at room temperature for up to a week. Avoid refrigeration, as it can cause the chocolate to lose its desirable texture and may result in a less satisfying crunch. If you live in a warm climate, opting for the fridge is acceptable, but allow them to come to room temperature before serving to restore that first bite's full flavor.
For serving, these bars can be paired with a scoop of vanilla ice cream for an indulgent dessert, or you can crumble them over yogurt for a delightful breakfast treat. If you want to share the joy, these bars make a great gift when wrapped nicely in cellophane or a decorative box!
Ingredients
Gather the following ingredients to make your delicious Chocolate Honeycomb Bars:
Honeycomb Ingredients
- 1 cup granulated sugar
- 1/2 cup light corn syrup
- 1 tablespoon baking soda
Chocolate Coating
- 200g dark chocolate, chopped
- 1 tablespoon coconut oil (optional, for sheen)
Make sure to have these ingredients ready before you start cooking!
Instructions
Follow these steps to create your Chocolate Honeycomb Bars:
Prepare the Pan
Line an 8-inch square baking pan with parchment paper, allowing some overhang for easy removal.
Make the Honeycomb
In a large saucepan, combine sugar and corn syrup over medium heat. Stir continuously until the sugar dissolves and the mixture comes to a boil. Stop stirring and let it boil undisturbed until it reaches a light amber color.
Add Baking Soda
Remove the saucepan from heat and quickly stir in the baking soda. The mixture will bubble up vigorously. Pour immediately into the prepared pan and allow it to cool completely.
Melt the Chocolate
While the honeycomb is cooling, melt the chopped dark chocolate and coconut oil (if using) in a microwave or double boiler until smooth.
Coat the Honeycomb
Once the honeycomb is cool, break it into chunks and dip them into the melted chocolate, ensuring they are fully coated. Place the coated pieces on a parchment-lined tray.
Set and Serve
Refrigerate the chocolate-covered honeycomb bars until the chocolate is set. Cut into squares or bars and enjoy!
Now you're ready to savor your homemade Chocolate Honeycomb Bars!
Pro Tips
- For an extra touch, sprinkle some flaked sea salt over the chocolate before it sets. You can also try drizzling white chocolate over the bars for a beautiful presentation.
Troubleshooting Tips
If your honeycomb doesn't achieve the desired crunch, it might be due to undercooking. Ensure you let the sugar syrup boil until it reaches that light amber color, as this indicates that the sugar has caramelized properly. If it's too hard and difficult to chew, it may have been cooked too long, so keep a close eye on it during the final moments.
If the chocolate coating is thick or clumpy, ensure that the chocolate is fully melted and smooth before dipping your honeycomb pieces. You can also control the consistency by using coconut oil; adding this will create a more fluid texture, making it easier to achieve an even coating over all the pieces.
Variations to Consider
Feel free to customize your Chocolate Honeycomb Bars by adding nuts or seeds into the honeycomb mixture before pouring it into the pan. Chopped almonds, hazelnuts, or even sesame seeds can bring added texture and flavor. Alternatively, sprinkle toppings such as crushed candy canes, coconut flakes, or sprinkles over the chocolate coating before it hardens for an exciting visual appeal.
For a twist on flavors, think about infusing your honeycomb with spices like cinnamon or chili powder. Just a pinch in the syrup can add warmth and depth, making these bars an unexpected delight at parties or gatherings.
Questions About Recipes
→ Can I use different types of sugar for the honeycomb?
Using brown sugar will alter the flavor slightly and may affect the texture, so it's best to stick with granulated sugar for the traditional honeycomb taste.
→ How should I store the chocolate honeycomb bars?
Store them in an airtight container at room temperature for up to a week. They can also be refrigerated if you prefer a firmer texture.
→ What can I do if my honeycomb didn't rise properly?
If it doesn't rise, it may be due to not heating the sugar properly or not adding the baking soda quickly enough. Make sure to follow the instructions closely.
→ Can I make these bars gluten-free?
Yes, all the ingredients listed are naturally gluten-free, so you can enjoy these bars without any gluten concerns!
Chocolate Honeycomb Bars
Created by: Clara Jennings
Recipe Type: Comfort Desserts
Skill Level: Intermediate
Final Quantity: 12 bars
What You'll Need
Honeycomb Ingredients
- 1 cup granulated sugar
- 1/2 cup light corn syrup
- 1 tablespoon baking soda
Chocolate Coating
- 200g dark chocolate, chopped
- 1 tablespoon coconut oil (optional, for sheen)
How-To Steps
Line an 8-inch square baking pan with parchment paper, allowing some overhang for easy removal.
In a large saucepan, combine sugar and corn syrup over medium heat. Stir continuously until the sugar dissolves and the mixture comes to a boil. Stop stirring and let it boil undisturbed until it reaches a light amber color.
Remove the saucepan from heat and quickly stir in the baking soda. The mixture will bubble up vigorously. Pour immediately into the prepared pan and allow it to cool completely.
While the honeycomb is cooling, melt the chopped dark chocolate and coconut oil (if using) in a microwave or double boiler until smooth.
Once the honeycomb is cool, break it into chunks and dip them into the melted chocolate, ensuring they are fully coated. Place the coated pieces on a parchment-lined tray.
Refrigerate the chocolate-covered honeycomb bars until the chocolate is set. Cut into squares or bars and enjoy!
Extra Tips
- For an extra touch, sprinkle some flaked sea salt over the chocolate before it sets. You can also try drizzling white chocolate over the bars for a beautiful presentation.
Nutritional Breakdown (Per Serving)
- Calories: 300 kcal
- Total Fat: 12g
- Saturated Fat: 7g
- Cholesterol: 0mg
- Sodium: 10mg
- Total Carbohydrates: 48g
- Dietary Fiber: 1g
- Sugars: 42g
- Protein: 2g